
How to Register a Group of 5 or More Attendees
A step-by-step guide for registering your school, district, or organization together in a single group.
Before You Begin
The person who starts this process is the Group Registrar. The Group Registrar may attend the conference themselves or register only on behalf of others. They are the only person who receives the final invoice, which is completed once every attendee in the group finishes their own registration.
Have this ready first: the first name, last name, and email address for each person you plan to add. You can add up to 15 people per group, and you can set up more than one group if your school or district needs it.
You can also use the MassCUE Price Quote template here [1], to gather your information and calculate costs.
Email your P.O. to bookkeeper@masscue.org [2]
Step-by-Step Registration Process
Follow these steps in order. You can save your progress and return at any time before completing payment.
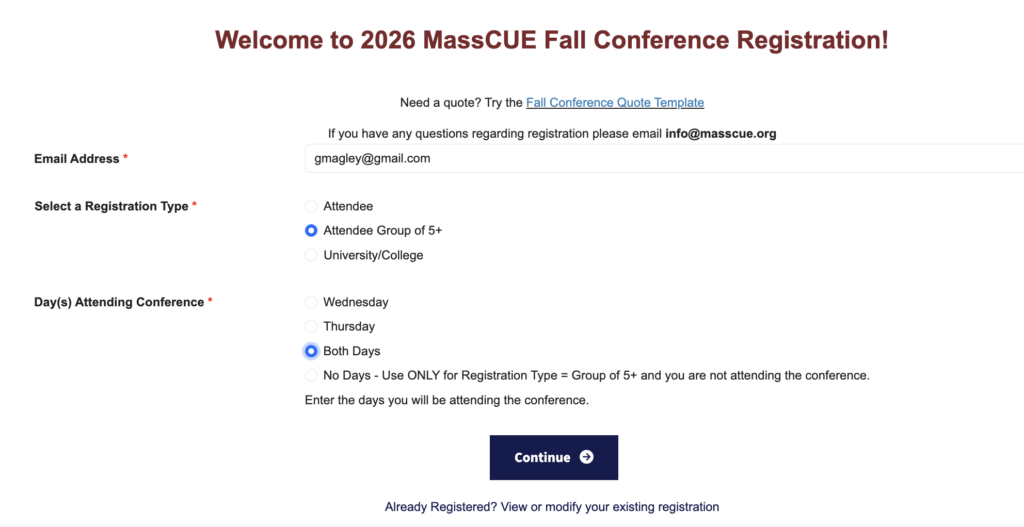
Step 1: Start your registration
Go to the MassCUE Fall Conference registration page [3] and click Register Today.
Step 2: Choose your registration type.
Enter your email address and select Attendee Group of 5+ as the registration type.
Next, select the day(s) you personally are attending: Wednesday, Thursday, or Both Days.
Not attending yourself? Choose No Days instead. This option is only for Group Registrars who are registering others but not attending the conference themselves. If you choose this, you will skip directly to adding your group and will not be asked for dietary, accessibility, or code of conduct information, since those apply only to attendees.
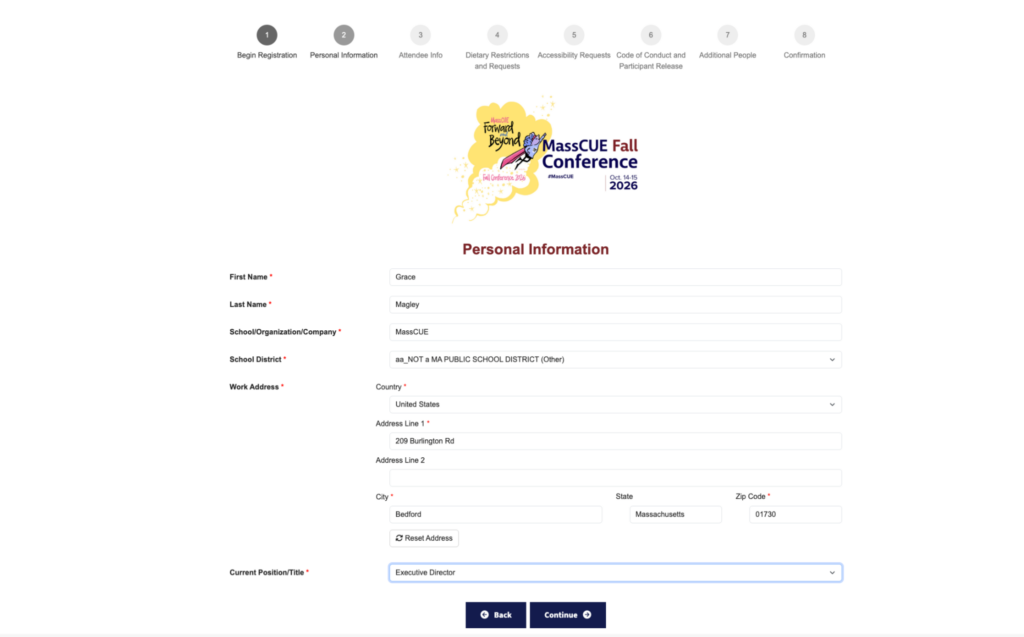
Step 3: Enter your personal information
Fill in your name, school or organization, district, work address, and current position or title, then click Continue.

Step 4: Confirm your registration and rate
Review the day(s) you selected and the group rate shown, then continue.
Step 5: Complete your own attendee details, if attending
If you are attending the conference, you will be asked to answer a few short questions before moving on to your group: dietary restrictions and other requests, accessibility requests, and the Code of Conduct and Participant Release. Once completed the Registrar will be brought to the page to add additional people to their group registration.


Step 6: Add your group
Click Add Group and enter the total number of additional people you are registering. If you are attending, do not include yourself in this count.
For example, if you are purchasing 5 spots total and you are attending, enter 4 here. If you are not attending, enter 5.
Click Save to return to the Group Registration page, where your group now appears with the number of open spots you just created.
Step 7: Add each attendee's details
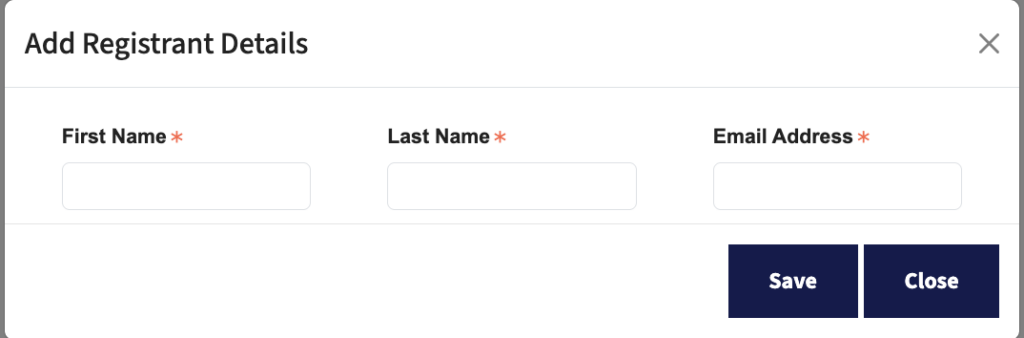
Click the person icon next to your group to open Add Registrant Details. Enter the first name, last name, and email address for one attendee, then click Save.
Attendees are added one at a time. Repeat this step for each person until your group is full. Each person you add will appear in a running list on the Group Registration page with a status of Incomplete.
Missing Information about attendees
If the Registrar does not have all of the people to add as attendees they can continue on with the registration and come back later to add the missing people or make changes to the group. Hit the Continue button to move to the Payment page

Step 8: Review the payment page
Click Continue to reach the Payment page. You will see a charge only for your own registration, not for the full group.
As each attendee completes their own registration using the link they're emailed, their cost is added to your invoice automatically. Their status will update from Incomplete to Complete once they finish.
If your district has a discount code, enter it here and click Apply.
Step 9: Choose a payment method and submit
For group registrations, we recommend paying by invoice or purchase order rather than credit card, since the total will keep growing as your group completes their registrations.
Fill in the billing contact name, email, and phone number, along with the billing address, then click Make Payment to finish.

Step 10: Your group receives their invitation
Once you finish, each person you added receives an email with a personal link to complete their own registration.
From your confirmation page, click Modify Registration at any time to return to your group. There you can copy the group's general registration link, or expand the list to copy a personal link for any individual attendee to resend yourself.

Good to Know
What if I need to cancel or swap someone out?
Cancellations made on or before October 1, 2026 receive a full refund. After that date, a substitute may be sent in your place. If no replacement is identified, no refund will be issued.
Do groups of fewer than 20 get a discount?
Groups of 5–19 pay the standard per-person member rate. The additional 10% discount is reserved for districts sending 20 or more attendees, and it's applied to the total invoice automatically after the conference, not at the time of registration.
Can I check on my group's status later?
Yes. Return to your confirmation page and click Modify Registration as often as you'd like. You'll see each attendee's status update from Incomplete to Complete, along with their registration total, as they finish.